Sonic Comfort Food

The little video at the end of my last post hinted that a full track would be coming soon, and it’s here. As per the liner notes, this is an unapologetically cheesy track. It does not pretend to break any musical ground, but instead basks in the clichés of mid-90s mainstream dance, aiming to evoke memories of one-hit wonders from the era and infuse them with a bit of TB-303 goodness.
(Aside: does Bablyon Zoo’s Spaceman count as a troll track? I always remember the sped-up, almost breakbeat sections before the 30 second mark and after 3:30, and none of the weird stuff in the middle. This is more like it.)
Anyway, shortly after releasing the track, I stumbled across this article on “ear candy” production tricks, and realised that in the unabashed pursuit of style over substance, I’ve used four of the six in this very track. I thought I’d share some others I’m quite fond of as well.
Pitch & formant shifting
MusicRadar count these as two separate tricks, but really, they’re just different settings on the same plugin - or at least, that’s the case for both Little AlterBoy (pictured in their article), and the similar Waves Vocal Bender, which I use because I got it at a steep discount & it does the job.
For Stardust, I took the pitch up an octave, the formants down three semitones (I was going for “dusky”, not Spaceman sped-up), and blended it back in with the dry vocal at around 30%, increased to 50% during the two “chorus” sections. If they can really be called that.
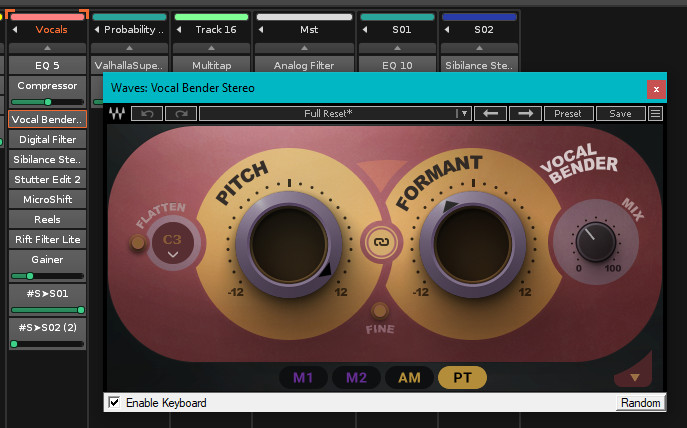
Honourable mention: it’s not the kind of pitch-shifting they’re talking about, but I also used an auto-tune editor to produce the three different tunings of the word “dust” from a single take (starting at 0:43 in the “radio edit” version). I also use vocal stutter effects towards the end, which MusicRadar warns “might have a tendency to date your mix” - which, in this case, is exactly what I was going for!
Reverse reverb
I didn’t use this one here, but I’ve used similar tricks in the past, in particular taking sounds with nice long tails - gongs, crash cymbals, etc. - and reversing them, then playing that during the build-up to the “real” hit at the start of the next bar. Soundtrackers are at heart just fancy samplers, and Renoise is at heart just a fancy soundtracker, so that kind of sample manipulation is trivial.
Vocoding
Again, didn’t use this one here, but I’m a big fan. Done it before; will definitely do it again. I second their suggestion to use carrier sounds with lots of harmonics (or “rich spectral content” as they put it), and experiment with carrier harmonies rather than limit yourself to one note at a time.
Multi-tap delays
Yep. Went a bit overboard with this one on this track. At one point, the 303 is layered through Minimonsta’s built-in delay, a “gapper” that basically selectively drops small sections of the sound, followed by two other multi-tap delays: a slow spacious one as an alternative to reverb, adding a sense of scale; and a much shorter one added in later sections to change things up.
Bonus: automating the mix of multiple effects in Renoise
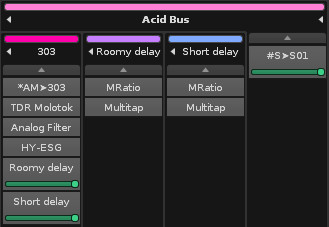
Renoise has limitations on sends/inserts, but I have a favourite trick to work around those when you want to blend effects that don’t have a built in wet/dry control: put your “dry” sound in a track group, with the effects you want to blend on other tracks within the group, then use a sidechain device on the dry track & a receiver such as MRatio on the FX tracks to provide them their input. You can then automate the levels of the effects by automating either the sidechain send level, or the receiver level; plus you can add “bus-wide” effects over the whole lot by putting them on the group itself.
Master FX
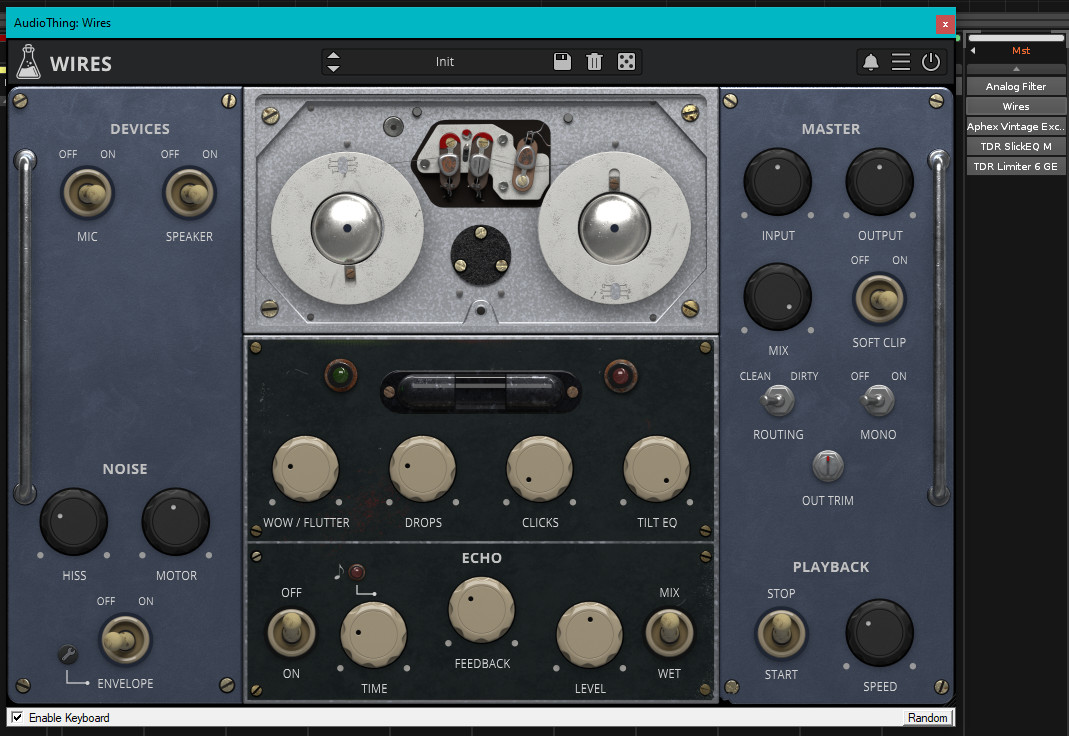
Yep. For the “fade in” at the start of the track, I used two things on the master bus: a simple bandpass filter with a descending corner frequency, and AudioThing’s Wires, which provides further gritty degradation, as well as the tape start effect right at the very beginning, courtesy of automating flipping the playback start/stop switch in the bottom right.
I picked up both Wires and Reels in a recent sale, and am not embarrassed to say I think I’ve used multiple instances of both - sometimes in series on the same sound - in every track I’ve worked on since.
Exciters and Widening
Two of my favourite things to put on the master bus recently are exciters and stereo wideners. Both have to be used sparingly. The former, if over-applied, can make everything sound tinny and harsh. The latter, depending on the kind of widening implemented, can risk introducing unwanted phase shift and risk phase cancellation and other mono compatibility issues. Alternatively, if you’re using something like a mid/side compressor for widening (by reducing the volume of the mids, and/or boosting the sides), make sure you check your mix on stereo speakers, not just headphones, as I’ve found the change in listening environment from what are effectively ear-mounted speakers to wider-spaced, further-away speakers is sometimes necessary to identify whether things no longer gel.
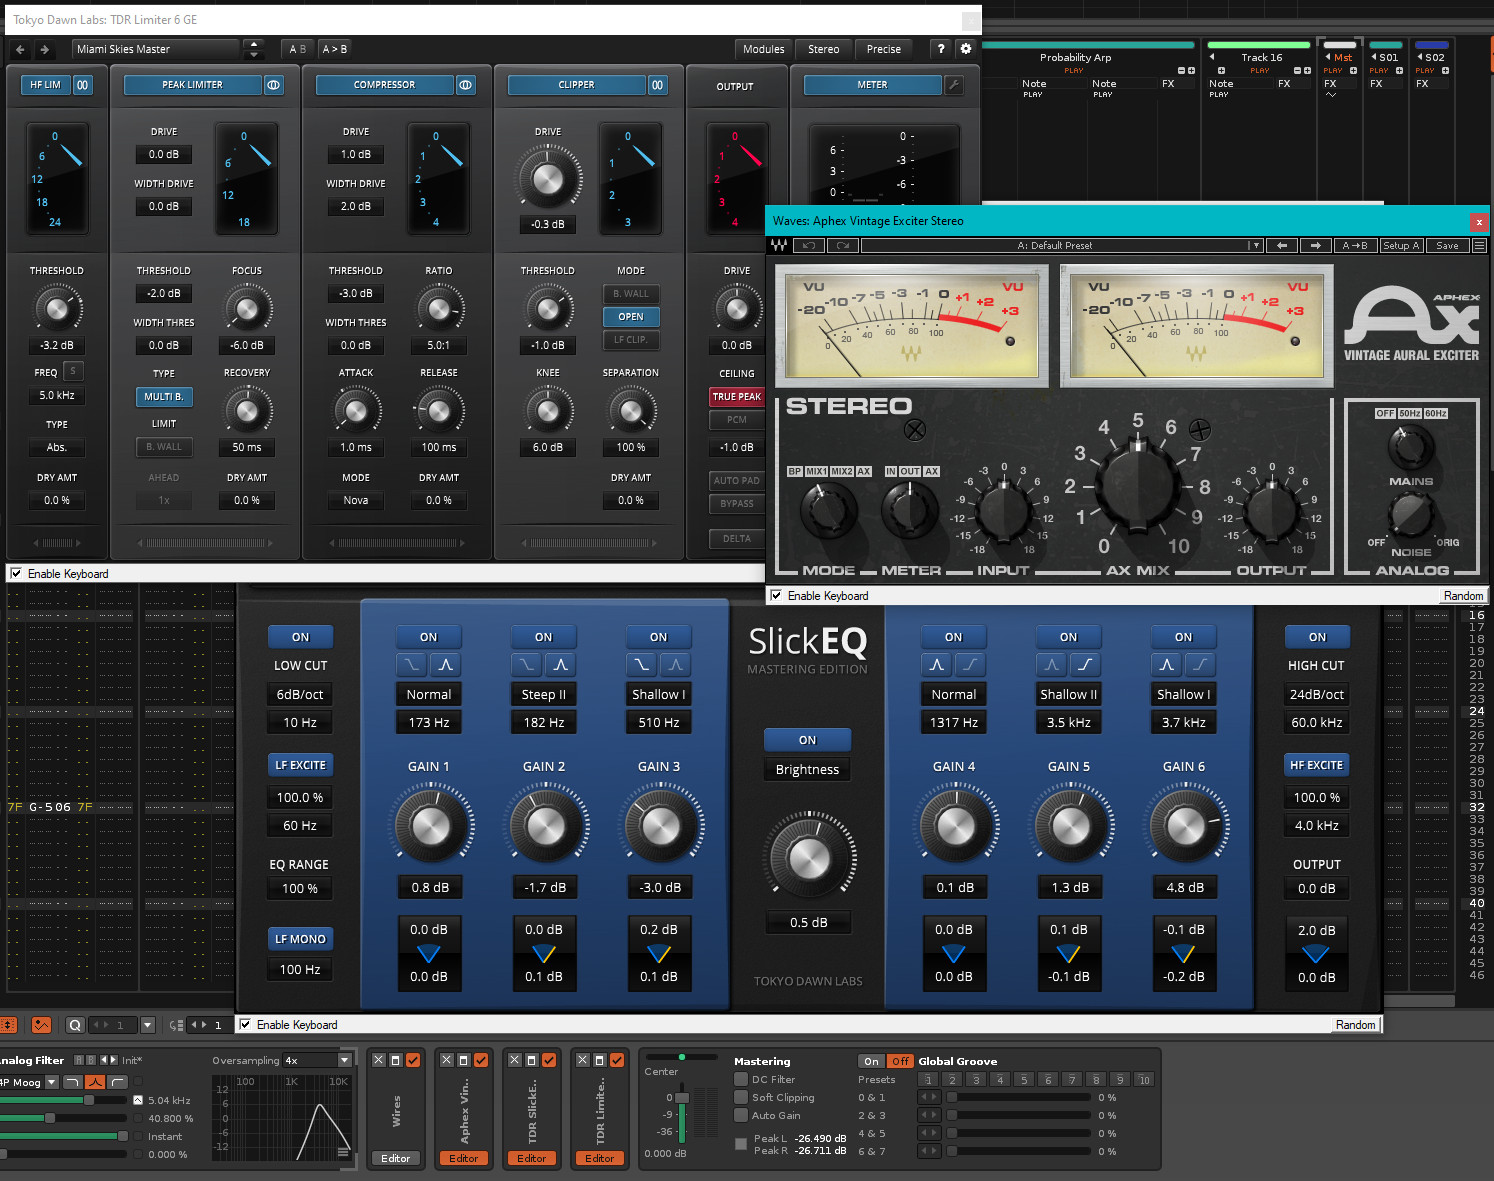
I’ve used all three on the master bus in Stardust: an exciter, widening via phase-based stereo expansion, and widening via boosting side volume.
There’s Waves vintage exciter in front of my master EQ; my current master EQ of choice - SlickEQ ME - has built-in low & high-frequency exciters with tunable corner frequencies, and per-band & global stereo width controls (the cone with “2.0 dB” above it in the bottom right); then finally, I’ve got the compressor in Limiter 6 GE giving a 1 dB boost to the sides.
Here’s a little demo: the same section of the track repeated three times, first without any widening or exciters, then with just the stereo widening, then with widening plus exciters. Headphones on for maximum effect.
Other Tricks
So other than the above, what other tricks did I employ? Well, other than the ones related to track structure itself - the four-on-the-floor beat, the repetitive vocal motif, the changing up of layers over time, etc. - there are two things in particular I did that I think of as “tricks”.
Subtle Dissonance
If you’ve studied a little music theory but not really dived into producing/composing your own material, you’re probably aware that Dissonance Is Bad. You want to choose your chords from the palette offered up by the key you’re in, and you want your melodic elements to harmonise nicely with those chords. But sometimes a little selective dissonance, subtly employed, can elevate things in a way that most people won’t even notice: done right, things just “sound better”, though you’d be hard pressed to say why without the stems or score in front of you.
Here are the first two chords used in the strings on Stardust:
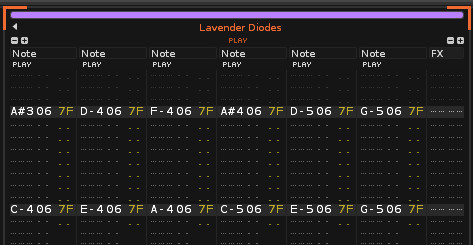
Notice anything strange? The eagle-eyed among you may notice there’s a G in that B-flat major chord, and an A in the C major chord. Both chords are octave-doubled; the G in the B-flat sits right up at the top, “extending” the range of the chord a little, whereas the A in the C major replaces the G in the lower triad, sitting right in the middle, more subtle. We’re in D minor here, and both serve to make a bog-standard VI-VII-I progression sound just a little less vanilla.
Headphones on again! Here’s that same VI-VII-I chord progression played twice, first as bog-standard, harmony-obeying chords, then with the added dissonance. Then I play the normal & dissonant VI chord a couple of times back-to-back just to highlight the difference.
Guitar Amps Aren’t Just for Guitars
Staying with that string sound, another thing I did was run it through a guitar amp & cabinet simulator. Nothing fancy, just the one that ships with Renoise. But I think the end result is rather nice. You could probably replicate the effect - or, at least, get very close - with a simple bit of EQ; a slight boost to the lows, a slight cut to the mids… but it’s not just about this one particular end result, it’s also about the process. There’s a whole array of different cabinet styles to choose from, along with wet/dry mix level, gain (which, of course, is “overdrive” when pushed high enough), a built-in five band EQ, and a choice of signal routings through amp, EQ, and cabinet.
If I’ve loaded up a bread & butter preset on a synth, and want to shake things up a bit without spending hours on sound design, adding an amp cabinet and spending a few minutes fiddling with the settings can often be just what it needs.
One final audio demo: same strings, same chord progression; first with the amp cabinet disabled, then again with it enabled. I don’t think I even strayed far from the effect’s default settings: “All Classic” cabinet, not much gain, bit of both wet and dry signals mixed in the output.
As I said earlier, you could get most of the way there with just a touch of EQ, but I prefer this method, and could have trivially taken things much further if warranted. It just sounds a bit more… “cinematic”, don’t you think? Not that the base sound isn’t nice on its own.
Smoke and Mirrors
Are these things really “tricks” if they actually work? Well, yes and no. In a track like Stardust, where I deliberately made so many elements as basic as possible in deliberate pursuit of style over substance, I’d say they’re tricks: hopefully they serve to make the finished result sound a little bit less like I made it in my bedroom, although the individual elements have been the staple of many a bedroom techno musician for decades. (Hopefully. I’m still learning here.)
But the same tricks can, and I would argue should, be employed on more musically complex material as well. Just because something has substance doesn’t mean it can’t also have style.